Organizing a Stenciling Project
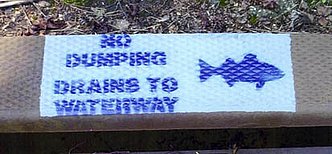
Storm drain stenciling is a fun and constructive project that aims to reduce non-point source pollution of our waters. Based on federal legislation, many states require that municipalities mark all storm drains with an anti-pollution message. For example, marking storm drains with an anti-pollution message is an education and outreach requirement for all New Jersey municipalities due to new rules to manage stormwater pollution.
Over the years, Clean Ocean Action has helped school, scout, and citizen and community groups organize successful storm drain stenciling projects in New Jersey and beyond. Clean Ocean Action has a storm drain stencilling kit available for purchase. Our kit has been ordered and used by students and groups in the United States, and internationally. To order one of our Storm Drain Stenciling Kits, which includes more in-depth instructions, two reusable stencils and 50 educational door hangers, please click here.
7 Easy Steps to a Successful Stenciling Project
1. Form a plan of action. Critical decisions include: which storm drains to stencil, what kind of paint to use (liquid versus spray paint), where to get your supplies (and possible donors of supplies), when you will do the project (temperature must be above 55, plan a rain date as well) and who will help you.
2. Contact the appropriate government agency for permission to stencil the storm drains. This may be your municipal government, county government, state government or some other entity. There are different methods of marking storm drains, stenciling being one choice. Ask permission to do your project and also ask for guidance on which storm drains the town needs marked and what type and color of paint they would prefer. For example, they may want you to paint the stencil in one color, over top of a background painted in a different color. Ask them for a map of the storm drain system so that you can mark down the storm drains that you stencil. Click here for a sample letter of permission.
If your storm drains are in a busy area with significant vehicular traffic, orange traffic cones or safety vests are a good idea. Your municipality may be able to lend these to you, or may even provide a police escort for additional safety.
3. Request support from local businesses. Ask paint or hardware stores to donate the paint and other supplies that you'll need. Here's the list of what you need: stencils, non-toxic paint, paint brushes or sponges, a paint bucket or tray to pour liquid paint in, a wire or other stiff brush for clearing off the drain, trash bags and gloves. Click here for a sample letter asking for support.
4. Educate and invite your community. Include information about the purpose of your activity, your message, date(s) and a contact person. Distribute informational materials to local residents through flyers/posters, articles or letters to the editor of your local paper or an announcement on a community bulletin board. Send a media alert to the local press two to five days before the event, inviting them to come to your stenciling day and cover the story for their paper. Follow up with a phone call to confirm who can come. Click here for a sample media alert.
5. Assign volunteers to neighborhoods, provide maps and estimate time. Depending on how many storm drains you want to stencil, and how many volunteers you have, divide the group into smaller work groups. Adult chaperones should accompany all groups so that all children are supervised. Each group is responsible for stenciling storm drains and distributing educational materials (such as the door hangers that come with Clean Ocean Action's Stenciling Kit) to neighboring residences and businesses. Be sure to send cameras out with each volunteer group to capture pictures of your project.
6. Start stenciling! Once you have arrived at the storm drain that you are going to stencil, follow these simple steps for success:
a. Ensure your safety. Put out orange cones, put on an orange safety vest or otherwise make your presence very visible to passing traffic.
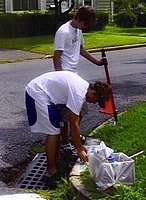
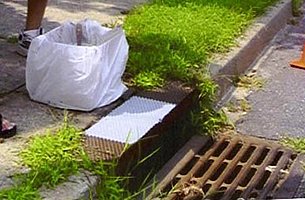
b. Clean the area around the storm drain. Pick up any litter or trash that is near the drain. Choose the part of the storm drain that you will be stenciling and wipe it clean with a wire or stiff brush.
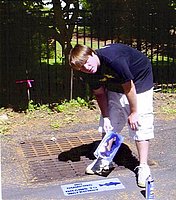
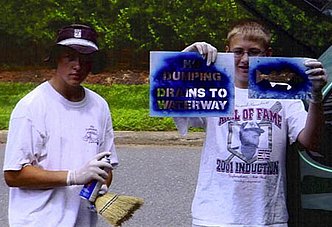
c. Lay out the stencils where you want to paint them. Secure them to the drain with tape, or ask another volunteer to hold them for you.
d. Paint the background color (if required by your town). Then, paint the stencils carefully. Remember, this stencil is going to be on the storm drain for at least 3-5 years, so you want it to look good.
e. Carefully remove the stencils and let the area dry, being cautious to protect the wet paint from smearing or trapping blowing debris.
7. Follow up. Send a thank-you note and photos of the day to the municipality. Include a list or map of the storm drains that you stenciled. Commit to maintaining those storm drains, both by conducting regular cleanups of the area around them and by re-touching or re-painting the storm drain when the stencil begins to fade. Send thank-you notes to all donors with photos of the day. You may even want to frame some of your pictures for the donor(s) to display in their business(es). Send a press release to local media with photos for printing in the paper. A sample press release may be found by clicking here. Consider assembling a photo collage of your project for display at a local library or school.
If you purchased a storm drain stenciling kit from Clean Ocean Action, be sure to complete the form on page 4, reporting the details of your project. Alternatively, you can report your results to Education@CleanOceanAction.org.



 Donate